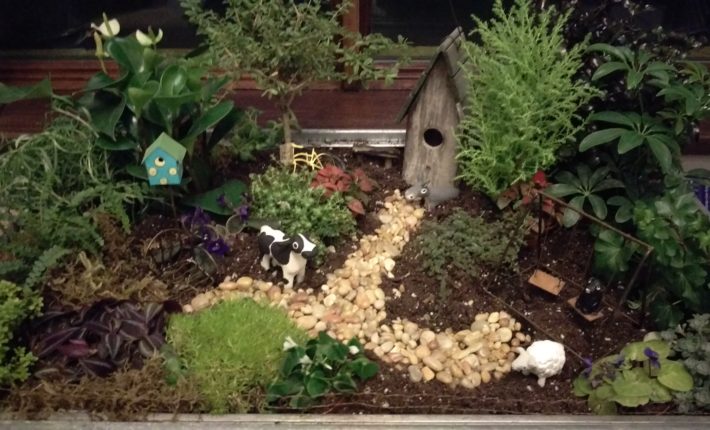
When I was working at Weston Nurseries in New England in 2003, I became obsessed with a trend that was sweeping the East Coast, mini/fairy gardening. My sweet mother was also the beneficiary of this trend as I got her hooked while sending her items each holiday or birthday. When she would come to MA for a visit, she would wander the nursery where we had our fairy gardens displayed and make my obliging daddy take pictures from every angle. I love most anything miniature! Mini furniture, birdhouses, animals, pathways, mini plants, oh I can’t help myself! When the craze made its way to the West Coast I shouted a renewed WOO HOO and dug out all of my mini’s and the ones I had inherited as well. Whether displaying indoors or out, with fairy residents or not, you can make these gardens come to life for you too, and i’ll show you how! I dare say you might even become obsessed… I hope so anyway.
This projects focuses on my indoor garden for now, as my mountain town is still blanketed in snow. I love this wonderful way to bring the outdoors in, smell the dirt, and experience something live until I can fling my doors and windows open wide.
You will need:
A container (there is no wrong size just pick one suitable for your space), a piece of plastic or large garbage bag, large pebbles enough to layer in the bottom of your container, potting soil, selected plants, mini accessories of your liking (you can find these online or many garden stores carry them, shout out to Sun River Gardens, my personal favorite), a bag of small pebbles for a pathway, and a small watering can.
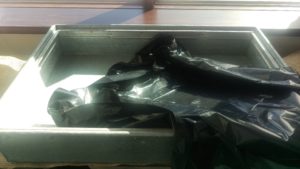
South facing window are always best for indoor mini gardens, the more sunlight the better. Begin by finding your desired container (I used a galvanized tray but you can use almost anything you like the shape of). In an indoor setting a container WITHOUT drainage holes is a must unless you want your mini garden to double as a fountain (let’s just say not good on most any indoor surface). Line the interior with a large sturdy piece of plastic or garbage bag. Make sure the plastic is big enough to fully line the inside of the container covering the corners and sides, you can tuck in the excess. As you tuck make sure you create a good moisture barrier around all of the edges, not leaving any spaces where water can escape. You may also want to put cork mats (found where ever house plants are sold) under your container to keep it from ruining the surface it is sitting on as some condensation may occur (or haphazard watering which may or may not occur at my house). Then select your plants from any garden center or home improvement store. I choose mini’s; ground covers, succulents, African violets, moss, ferns, herbs, little trees used in Bonsai, any plant that I like the shape of. I do not spend a fortune on plants that will go indoors though as this is a temperamental environment and some may not survive, and true to form for me I am off to the next project when the seasons change anyway. BUT! Those plants that are still thriving make it into my outdoor mini garden when weather permits.
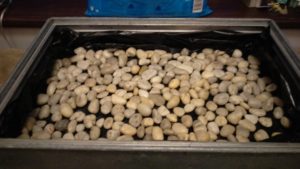
Once your plastic is secured, place a layer of larger pebbles over the entire bottom surface of your container. This will allow for drainage and help to keep your plants from sitting in water which can cause their roots to rot. Plants + sitting in water = dead plants (sad face)!
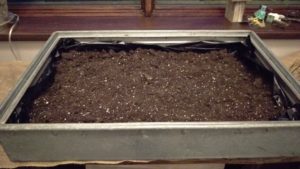
Then comes the dirt! Sniiiiiff………..who doesn’t love the smell of some good dirt?! I use a good organic potting mix. Good soil makes for happy plants. Begin by putting a layer in the bottom that you can nestle the plants into. You will fill in more dirt later.
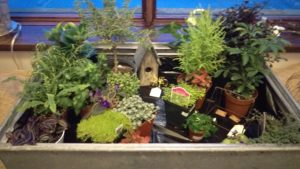
Here comes the creative part! Place your plants in the container to experiment with the lay-out. This will help you decide which plants need to be higher or lower. There is no right or wrong. I just try to achieve some sort of balance with taller plants in the back and closer to the edges. For inspiration, take a gander out the window to see how nature designs. You can adjust height by putting more dirt under the plant or removing dirt. Sometimes leaving the plants in their plastic pot can also help with height placement. Make sure to plan out room for any structures, accessories, pathways, etc.
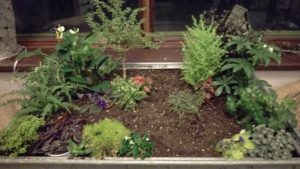
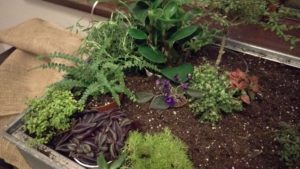
Now you can start to fill in around your plants with more potting soil. Caution! Listening to Led Zeppelin while inserting dirt may result in needing a dust pan and broom near-by.
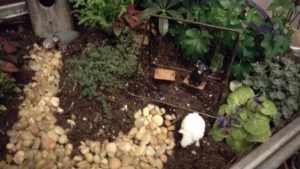
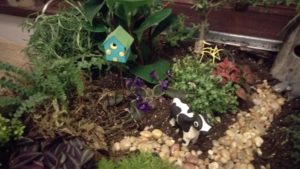
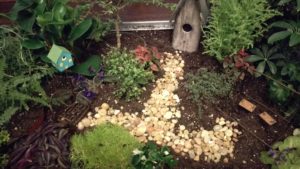
Place your structures, critters, etc. Create meandering pathways with pebbles by cutting off the corner of your bag and let pebbles spill out a little at a time. Have your pathway lead to imaginary places. Vary sizes of structures and accessories in your garden. This helps your garden look inviting and balanced. For instance, a tall house with a medium height birdhouse, and a low bench with animals sitting on them or peaking out of a nearby bush. Be careful not to over clutter. A garden that is “too busy” overwhelms and takes away the imagination. Have fun creating enchanted spaces as you think “If this were my life-sized garden, what would I want it to look like?” Don’t worry about perfection. What in nature is perfect anyway?
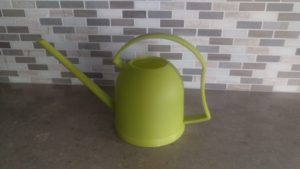
Don’t forget to water your newly planted mini garden, yes right now!
Care and maintenance: Just as plants + sitting in water = death, so does plants + hot sunny window + dry and thirsty = death! Your plants do not want to dry out! I found a trusty small spouted watering can (at my local market) that makes it easy to insert the spout right around the base of the plant and give it a good drink. My unscientific explanation of a good drink is with medium water flow from a small spout, count 1-2-3-4 somewhat slowly, then move on to the next plant. I water my mini garden at least once a week and as the weather gets hotter will probably water it more. I always check it with my finger first for degree of moisture that may exist so I don’t over water, succulents expecially. Don’t fret if you lose a plant or two as you learn the watering needs of your garden. It happens to all of us! Remember how earlier I said these indoor environments can be temperamental? Well, so can my watering habits… blush…
Now it’s time to sit back and admire your work and enjoy your creation (after you clean up of course)! And if you escape to make believe land with your mini garden animals, or wander your enchanted pebble path, I promise I won’t tell! Happy mini gardening!
